Thursday, January 7, 2010

Tiger Potatoes


They were going to be called "Zebra Potatoes" before I ran a Google search to see if anyone else had coined the term. Turns out "Zebra chip" is slang for a pathogen that makes potato chips come out all brown-streaked and weird looking. I opted not to willingly associate a potato-based side dish I'd made with a potato-attacking pathogen. Seemed like it would be both bad luck and a little gross.

You may have run across these Ze... ahem... Tiger Potatoes before. You may even have invented something similar yourself. They're very simple to make, and if anyone in your family prefers white potatoes to sweet, this is a great way to pump a few more vitamins into said heretic.

All you need are a russet potato, a sweet potato, and seasoning/garnish of choice to serve two.

Step #1

Peel your potatoes and cut wedges into the tops, leaving at least 1/4" of flesh in tact along the bottom. Reserve the wedges.


Step #2

Insert wedges into the potato of the opposite color as shown. If they don't quite fit, you can opt to trim them down or widen the crevices.


Step #3

Wrap each potato securely in a paper towel and place right-side-up in your microwave. Microwave on high for three minutes.

Step #4

Let cool a little bit before attempting to remove the paper towel, but don't wait too long or it will stick. Serve them up however you're inclined. I butterflied mine and added butter, salt, pepper, nutmeg, and a bit of fresh dill.


Have you ever made Tiger Potatoes? I imagine I'm not the first, and I'd do it again in a heartbeat. The only thing missing from mine was big dollops of sour cream. Wish I'd had some in the house.


Beat the eggs. Whip the cream. Show no mercy.


Wednesday, January 6, 2010

Comfort Food: What Does That Phrase Mean to You?


I have been sick the past few days. I mean REALLY sick. Went-to-bed-the-night-of-January-third-wrapped-in-four-extra-blankets-and-convinced-I-was-a-Japanese-pastry-chef sick.

What do you crave when you feel this lousy?

For me, the question has to be answered in stages.

Stage #1: Japanese-pastry-chef sick.

Nothing. I'll ask my body, "Hey body, are you hungry?" and it goes, "Not now, kid. I'm tryin to flush out a virus here!" with the surly Jersey repairman accent and everything.

Stage #2: Improved, but still unable to leave the bed.

Something very small and basic, and usually very specific as well. A handful of cherry tomatoes (not sliced regular tomatoes), a piece of a baguette that's been ripped off (not cut... and forget about giving me any other type of bread), a plain Hershey's Kiss (so help you if I find an almond in there!)

Stage #3: Up and about for half an hour before the sinus headache you got from looking at the computer monitor drives you back under the covers.

Takeout. Usually pho or tacos. Don't ask me why tacos... I think it has something to do with the vinegar in the hot sauce. Vinegar in small doses helps the body retain fluids. But I digress.

Stage #4: Take a shower, wash the sheets, and proceed through the rest of the day with relative normality but for a Dayquil-induced haze.

Stuff that Western society actually considers comfort food: Stew, ice cream, cookies, hot tea, etc.

Does anyone else have stages like this? Or do you crave chicken noodle soup the whole time?


Beat the eggs. Whip the cream. Show no mercy.


Tuesday, January 5, 2010

Chickenless Inspiration: Shish Kebab


I know plenty of amazing cooks who are not chickenless at all. And that's fine- the world needs people who can make marinara sauce using a recipe that's been in the family for three generations. There are many ways in which I can't hold a candle to these folks. I've never made bread with yeast in it, I throw all my meat trimmings into the same tupperware container to be simmered in a single unglamorous pot of mystery broth, and I've never served a meal in my home that was intended for more than six people. But if there's one way I kick ass in the kitchen, it's at getting a trillion different variations out of a single recipe. That said, here is my professional opinion: If you ever want to take a couple little baby steps outside the box while maintaining your reputation as a slam-bang chef, shish kebab is the way to do it.

It's easy.

It's fun.

It's food on a stick, people!

And if you needed a meal on the table five minutes ago, you just can't beat broiled shish kebab. You won't get those nifty black grill marks (minor bummer), but you will get equally delicious and healthy fare in much less time. The shish kebab of meatballs, Granny Smith apples, and pre-roasted beets and sweet potatoes pictured above took me about thirty minutes. That includes meat seasoning time, skewer assembly time, cook time, arrangement time, and yes, even picture-taking time.

Here are a few goals to keep in mind that will help stimulate your imagination as you approach the art of kebabing.

Get kids to eat home-cooked meals.

Is there a kid in your family who turns up his nose at anything but Mickey-D's? Roll chunks of white meat chicken in beaten egg, bread crumbs, and salt. Skewer them. Ta-da! Homemade chicken nuggets on a stick. Who's going to reject chicken nuggets on a stick? Nobody, that's who. Maybe your kid prefers hamburgers? Try serving kebabed meatballs with a bun and condiments. Any number of different foods will work. And here's the cool part: You can modify your kiddie shish kebab recipes to get grown-up fare. Using the chicken nuggets example, add dried coconut to the batter. Swap out the ketchup for a sophisticated marmalade dipping sauce, and you've got coconut chicken to complement those pina coladas at your next cocktail party.

Play with colors.

Awhile back I made a rainbow plate; a fun and useful exercise, as my presentation skills are lacking where color is concerned. Whether you share this weakness or have excellent color juxtaposition that you would like to show off, shish kebab is a blank canvas just begging for color play.

In case you've never seen one, here is a color wheel:


Complementary color schemes are composed of opposites or near-opposites on the color wheel. These are your crowd-pleasers. Complementary schemes are attention-grabbing and mouth-watering (red tomatoes on green lettuce, for example). When company calls, try gussying up a drab brown meat, tofu, or tempeh shish kebab with bright fruits and veggies in opposing colors. For example, leave the purple skin on your eggplant; and since you're using purple as your first color, why not go with yellow bell peppers rather than red? For some beautiful examples of complementary color pairing, browse Citron et Vanille.

Analogous color schemes are composed of colors that are very, very similar. They may not even be different colors so much as different shades. A skewer of analogous foods may not have the same Wow! factor as a skewer of complementary ones, but for a low-key gathering or romantic dinner, there is something irresistibly refined about it. Picture a plateful of skewered yellow-green baby artichokes served with sunny-colored hollandaise dipping sauce, for example.

Showcase your favorite local fish, game, or produce.

There are certain people whose ears I can talk clean off about the taste of local versus imported ingredients, and they just don't get it. They think the more exotic the cuisine, the better. If you're a locavore with a garden full of fresh veggies or a river full of fresh fish, there's no better way to convert doubters than to serve them a skewer of the best your area has to offer. No glazes. No dipping sauces. Just a teensy-weensy bit of salt and pepper, maybe some fresh herbs. Let the food do the talking.

Revolutionize breakfast.

Start with a base such as hash browns, crepes, lettuce leaves, or a plain open-faced omelette. Then load your skewers up with chunks of ham or sausage, green peppers, onions, cherry tomatoes, pineapple... whatever you feel like having for breakfast today. Lay the skewers over your base after cooking, serve with appropriate condiments, and enjoy!

Revolutionize dessert.

Many of us cook shish kebab as an entree or appetizer. But about half the trillion variations I've dreamed up can be placed in the dessert category. The following are types of fruit that hold up well on the grill or under the broiler (though bear in mind they will cook quickly; as little as two minutes per side will do the trick in most cases):

Apples
Strawberries
Pineapples
Peaches
Nectarines
Plums
Kiwi
Mango
Star Fruit
Pears
Honeydew
Cantaloupe
Figs
Kumquats
Papaya

... And many more.

Now, let's expand this concept of grilled fruit on a stick! Alternate chunks of fruit with marshmallows, and serve on their own or s'more style with chocolate and graham crackers. You could also serve a skewer of colorful fruits alongside a slice of pound cake or a dish of ice cream. And as far as dipping sauces go, the possibilities are endless. Here are a few suggestions:

Caramel Sauce
Butterscotch
Chocolate Sauce or Fondue
Yogurt
Maple Syrup
Marshmallow Fluff
Peanut Butter Sauce
Simple Syrup
Jam
Baked Brie with Drunken Brown Sugar Sauce
Creme Fraiche
Whipped Cream
Fruit Sauce (boil down fruit juice with sugar until it thickens)


Has this post gotten your creative juices flowing? If so, what kind of shish kebab will you try next? If not, would you like me to spend more time on a particular topic or offer more suggestions? Feel free to comment or send pics of your own kebabed creations to dontbeawuss@gmail.com.


Beat the eggs. Whip the cream. Show no mercy.


Wednesday, December 30, 2009

Two Pies!

I told you about the Christmas presents I made. Now what about the people to whom I brought them?

My husband and I enjoyed a fun but picture-free Christmas Eve at my dad's in Vero Beach. My grandparents on that side are proper to the point where they leave the rum out of the jingle bell punch (everybody's jingle bell punch... not just theirs), and I didn't know how well snapping pictures at the table would go over. So my dad's famous crab au gratin casserole will have to be a story for another day. I exercised the eating muscles plenty and rested up the picture-taking muscles for Christmas Day at my mom's.

Visit her blog if you want to hear her whine about leaving the green beans in the microwave overnight. Stay if you want to hear me rave about what a porktastic, cosmotastic, pietastic meal we were treated to.


Stuffed pork loin for dinner, cosmopolitans with a secret ingredient (she knew I'd suffered through the previous evening booze-free!), and a two-pie breakfast for Boxing Day... how much more completely awesome does it get? TWO PIES, PEOPLE. Quiche and apple-cranberry. COUNT 'EM, TWO!!


Now, as far as what the pork loins were stuffed with... I see she hasn't put either recipe up on her blog. Luckily she gave me a copy of one. It appears to be from page 234 of the December 2009 edition of Cooking Light. The unfortunately punctuated title is, "Fruit and Walnut-Stuffed Pork Loin" [sic]. (Or am I old-fashioned for wanting to add that extra hyphen after the word "Fruit"? Tasty Trix? Copyranter? Someone help me out here.) The other one was stuffed with sun dried tomatoes and gorgonzola, and I'm not sure what else. She made it up herself though, so don't expect to find it anywhere else in the known universe. I'm sure if you pop over to her blog and ask real nice in the comments, she'll let you have the recipe.

Boxing Day was spent as it should be... catching up with old friends. This meant my diet consisted of leftovers and takeout. Nothing exciting.

The 27th was my husband's grandfather's birthday, so my mother-in-law pulled out all the stops and served both lobster tails and beef wellington.


I snapped a picture of my beef after it was cut as well, but standard dinner party lighting rendered my camera fairly useless. Which I'm sorry to report, because that beef wellington was TO DIE FOR. The color, texture... everything was perfect. Oh, well. Sometime when you run a food blog, you have to stop, take a deep breath, and remember that food is fleeting. With cooks like the ones in my family, there will be plenty more pictures to take!


Beat the eggs. Whip the cream. Show no mercy.


Tuesday, December 29, 2009

Christmas Presents


Another year of no money, another year of packaging cheap homemade foods up pretty and calling them gifts. This Christmas it was jam and cookies.

I had made jam before, but never canned it, and was excited to try. This recipe for Florida Citrus Marmalade (see below) was inspired by a recipe for Cranberry Orange Marmalade on page 188 of a Cooking Light holiday edition from November/December 2007. I wanted to see if I could achieve sufficient tartness using grapefruit and key limes instead of cranberries, which aren't native to Florida. In the future I may increase my limeage, but it came out pretty well for a first attempt.

As for the cookies, I made these of the potato chip variety (thanks a million to Brie le Grand Fromage!) and added chocolate chips. I wanted to dip them in chocolate, but there would be days' worth of car travel before many of these packages reached their destinations. As my Florida readers can tell you, the weather fluctuates like mad at this time of year, so I wouldn't want to risk making a melt-prone gift.


Here's what my kitchen looked like while I was making the cookies. Thought you may get a kick out of it:


Florida Citrus Marmalade

Ingredients

8 lbs. navel oranges (about 14 oranges)
2/3 of a ruby red grapefruit
6 key limes
6 c. sugar, divided
3 c. water


Directions

Zest two oranges and two limes. Remove peels from these and all other fruits. Chop the fruit and remove all seeds.


Combine chopped fruit and zest in a large saucepan with water and 2 cups of the sugar. Bring to a boil, then reduce heat to medium-low and simmer 15 minutes.

Add remaining sugar. Simmer approximately an hour and a half.


Meanwhile, sanitize your canning equipment. Pre-wash all jars, lids, and bands with antibacterial dish soap and water. Fill a pot with enough water to completely submerge your jars. Bring to a boil over medium-high and place jars, lids, and bands gently in the boiling water for five minutes or more. For the last minute or so, lower the end of a pair of tongs into the boiling water. When time is up, use the sanitized tongs to remove each piece from the pot and place it on a clean towel.

Spoon jam into the jars while still hot. Wipe anything that spills over the edge with a clean damp towel. Put on the lids and secure with the bands.

Lower jars gently back into the boiling water. Boil for ten minutes, then remove carefully with the tongs and place back on the towel. (The towel is there as a buffer between the hot jar and the cold countertop, a trick I learned from Alton Brown via a recommendation from Peas Love Carrots. This helps prevent spontaneous shattering). A couple hours later, check the tops to be sure they have sealed. If the button doesn't bounce back when you push it, hooray! Your jam will keep in the same condition for about a year. This recipe makes about a dozen 8-oz jars.


I had a jar left over for myself and my husband. Before I left to visit family on Christmas Eve, I had some for breakfast over toast and melted havarti. Yum! A little too sweet, but overall... yum!


Beat the eggs. Whip the cream. Show no mercy.


Chicken Thighs Stewed With Radish and Arugula


I have often wondered what stewed radish would taste like. A couple days before Christmas, I finally got around to it. Looking back, this recipe probably would have tasted better with white meat, but dark did the job.

Actually, "did the job" may not be the right phrase. My husband flipped out and said it was one of his favorite dishes I've ever made.

Now before you go adding radishes and arugula to all your stews, I doubt I have them to thank for the meal's success. Neither one tasted like much once it had been simmering for awhile. More likely I owe a debt of gratitude to my old humble friend garlic. I used more than my usual 2-3 cloves, which is something I'd definitely do again.

Chicken Thighs Stewed With Radish and Arugula

Ingredients

4 chicken thighs with skin
Salt and pepper to taste
2 Tbsp. olive oil
1 onion, sliced thin or diced large
1 c. radishes, sliced
1 carrot, sliced
5 cloves garlic, sliced thin
Splash Balsamic vinegar
1 Tbsp. fresh mixed herbs (I used flat-leaf parsley and oregano, but any herbs you might associate with traditional Southern Italian cuisine would do the trick)
2 tsp. dried mix herbs (I used marjoram, thyme, and more oregano... note that you can use more fresh herbs here instead; I just ran out)
Salt and pepper to taste
1 c. diced canned/packaged tomatoes (say it with me... "If you don't can your own, I recommend Pomi")
2 c. chicken broth
2 c. well-packed arugula
1 Tbsp. lemon juice


Directions

Season the meat with salt and pepper. Loosen the skin and get underneath if you can do this without ripping it.

Heat the olive oil in a stew pot over medium. Brown the chicken thighs for 10-12 minutes on the skin side; 5 minutes on the skinless side. Remove the chicken from the pot and place it in a covered dish. Alternatively, plate it and cover it with another plate to trap the heat. (Optional: Bellow, "Bwah-ha-ha-ha, heat, there's no escape for you now!")

Add the onion, radishes, carrot, and garlic to the pot and saute for 4-5 minutes. Splash on the vinegar and deglaze the pan. Add the herbs, salt, and pepper and continue sauteing until the onion is completely limp and translucent.

Arrange the chicken thighs over the veggies in the pot.

In a separate saucepan, combine the tomatoes and the broth. Stir well, then pour the mixture over the chicken and veggies. Bring the contents of the pot to a boil, then reduce the heat to medium-low. Cover and simmer 45 minutes.

Remove cover and add arugula and lemon juice. Push the arugula down into the liquid-filled spaces between the chicken using a long utensil such as a wooden spoon or a spatula. Re-cover and simmer 15 minutes more. Distribute the chicken pieces among four serving bowls and ladle the liquid over. Optional: Put bread, rice, or mashed potatoes in the bottoms of the bowls; or prepare a warm bread basket to pass around. Serves 4.


Beat the eggs. Whip the cream. Show no mercy.


Tuesday, December 22, 2009

Bruschette Three Ways


My mom gave us some lovely garden-fresh produce to bring home following her boat parade party. You don't see tomatoes on this blog too often unless they've been pulverized into a sauce or soup, and the reason for that is because my husband is an extraterrestrial of some kind and dislikes un-pulverized tomatoes. But this time, I couldn't resist leaving them in their original un-pulverized form. I mean, look at them! Aren't they gorgeous?


They're not gorgeous? How can you say something like... Oh, you must be looking at the weird excuse for an eggplant that she so cleverly sneaked into my doggie bag. (Just kidding, I agreed to take it. There will always be a special place in my heart for misshapen orphaned vegetables that nobody loves!)

Other gifted items included dinner rolls and a chocolate bell pepper. I had herbs and cheese in the house, so my mind jumped straight to bruschette. But because of my husband's tomato handicap, I decided to make two different kinds. And because there were two types of rolls, I ultimately ended up with three different kinds.


I won't bore you with recipes, since I made them all the same way, and there was only slight variation among the ingredients. While pre-roasting the eggplant and bell pepper, I sliced all the dinner rolls (some white, some pumpernickel) thinly and sprinkled on some grated cheese. I used parm for the white ones, mild cheddar for the pumpernickel ones; but I imagine you could do this with an infinite number of different cheeses. Then I used the vegetables and herbs in varying combos and popped each batch into the toaster oven at 350 for five minutes.


Long story short, I ended up with the following combos:

1. White bread, parm, roasted eggplant, roasted bell pepper, herbs
2. White bread, parm, chopped tomatoes, herbs
3. Pumpernickel bread, mild cheddar, roasted eggplant, roasted bell pepper


I tossed the eggplant and bell pepper with olive oil, salt, and black pepper before roasting. In fact, the first bite of eggplant I got was covered in black pepper, and the way my mouth recoiled I thought it might be tannic. After I had chewed a split second longer, I realized this wasn't the case, but I still thought the eggplant might have bred with a hot pepper or something. Eggplants and peppers are in the same family, so considering how ugly the the little guy was before cooking, you can see how I might have jumped to this conclusion. I even went so far as to call my mom and ask if that could have happened, like if she'd planted the eggplants and hot peppers next to one another or something. It took me until my next bite to learn that I just hadn't stirred well enough.

In any case, the rest of the roasted veggies were very enjoyable, if a bit lacking in the black pepper department. My husband and I ate our bruschette with green salads, which made for a welcomed light lunch after a night of stuffing ourselves at the boat parade party.


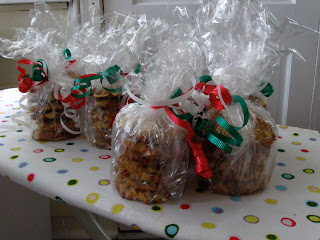
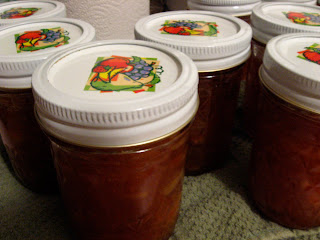
Off to Harvill's! Got a lot of work to do in the kitchen before a string of Christmases is to commence. I'm grateful to have so many loving family members within a couple hours' drive, but I am able neither to host nor to buy gifts for everyone this year, which means I must contribute a mutant amount of cooking, baking, and canning instead.

Hope to find time to post again soon. After the holidays, stuff should pretty much go back to normal. This means you'll start seeing Chickenless Cooks of the Week again. What interactive activities would you enjoy? Do you guys want to do another TV Dinner or Baffling Ingredient? Would you like to see something new? Let me know!


Beat the eggs. Whip the cream. Show no mercy.